I'm sure you have an old throw pillow lying around or that one that you love but it's just too plain! Well I've got the perfect solution for you: put a patch on it! I'm doing "mr" and "mrs" pillows, but you can do anything you wish! The possibilities are really endless! It's simple, and it will definitely take your pillow from boring to tres chic! Need I say more? Let's get started!
Materials:
2 throw pillows
Burlap (the amount of material you need depends on the size patch that you're making)
Hot glue gun
Glue sticks
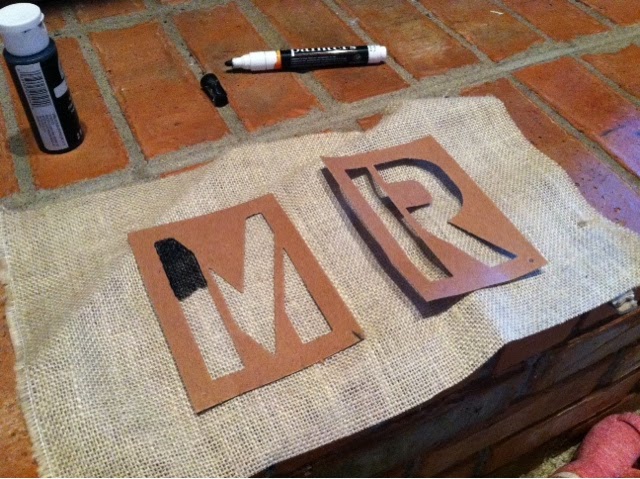
Stencils (I used 5 1/2 inch)
Paint or paint marker (I used black)
Sponge brush
Instructions:
First, you need to paint the stencil on the burlap so it can be drying. Either by using a paint marker or black paint and a sponge brush.
Once that's done, you can set them aside and let them dry.
Now you have time to go fix you a cup of coffee and relax for a few :) Or, if you have a very active toddler like I do, go fix you some coffee while chasing after your toddler and attempting to keep her away from the paint.
Once the paint is dry, trim up the burlap around the stencils. I left around a 2" space on each side of the letters.
Then, grab strands of the burlap on each corner to add some fray.
Once all four sides of the burlap are frayed, you are ready to grab your glue gun!
You are going to need to measure your pillow so that your patch is centered. (I'm using a rectangular-shaped burlap pillow that I made, but you can use any pillow). Once you've measured, get it centered on your pillow, and get ready to glue! Slowly glue each side to the pillow, putting the glue right up next to the fray. Just don't glue the fray down, because once the pillow is finished, it adds extra texture. Be very careful, because it is HOT glue. Believe me, I'm the queen of hot glue gun burns.Once it's dry, rub your fingers on the fray to make it stand up around all four sides.
Repeat these steps for both pillows:)
And this should be your finished product!
Please let me know how yours turn out!! I'd love to see pics! And I'd love to hear if you made any alterations to the pattern!
Enjoy!!!


No comments :
Post a Comment